Have you ever used the default WordPress search? Have you searched something on your own website using the search form?
And how did you like it? Did you find relevant results were sorted on top? And did it accept typos? I bet that you’re not always satisfied with how the search results came out.
Moreover, if you are a developer and have been working with websites with thousands of articles, you may found WordPress search a little slow. Especially if you are using something like live search. So, are you looking to have better WordPress search results?
Now, there are a couple of plugins such as SearchWP and Relevanssi which may
Fortunately, there is also a server-side solution which is great, called ElasticSearch. You can pair it with WordPress using a plugin. In this WordPress ElasticSearch Tutorial, you will discover what ElasticSearch actually is and how it can put WordPress search on a new level. Better WordPress search is possible and attainable!
What is Elasticsearch
According to their own description, Elasticsearch is a distributes, RESTful search and analytics engine capable of solving a growing number of use cases. That is quite a mouthful. But, in essence, Elasticsearch stores your data and makes it accessible to any kind of search action.
For example, it may search through a certain term appearing in the text. Additionally, it may also look into geographical data or chronological data. It may even combine several search data to uncover new patterns. And Elasticsearch is fast. This is especially useful if you need to search in large sets of data.
Why Elasticsearch is such a deal for having better WordPress search
So, why should I use Elasticsearch on WordPress then? Why is it such a deal? There are plenty of use cases.
- Sorting search results by their relevancy
- Accepting spelling mistakes in search terms, while still giving relevant results.
- Searching within custom metadata, taxonomies, categories and other data tied to a post. The default WordPress search only searches through the post content and the post titles.
- Drastic performance improvements compared to the normal WordPress search. Elasticsearch has no problem with thousands of posts or products. This can also lower the drain on server resources, which in turn may lower costs for large sites.
- Suggesting search terms to users. Remember how Google gives you hints on how to complete your search request? This exact feature is possible with Elasticsearch, on your own WordPress website.
- At last, rendering related posts using a simple function.
You may notice that Elasticsearch is especially useful for bigger websites and webshops. It is also particularly useful for building live-search and custom filters. Examples are web shop catalogue pages with price and category filters or directory listings with geographical information.
Implementing WordPress ElasticSearch with ElasticPress
Implementing Elasticsearch in WordPress is easy. The fine people at 10up made a plugin specifically for this, named ElasticPress. So let’s go ahead with this WordPress ElasticSearch tutorial!
There is one caveat however: your hosting party should support it. Cloudways supports Elasticsearch out of the box (besides having amazing performance and other features). Kinsta, a well performing managed WordPress host, has it as an add-on.
It just needs to be turned on and you are done:
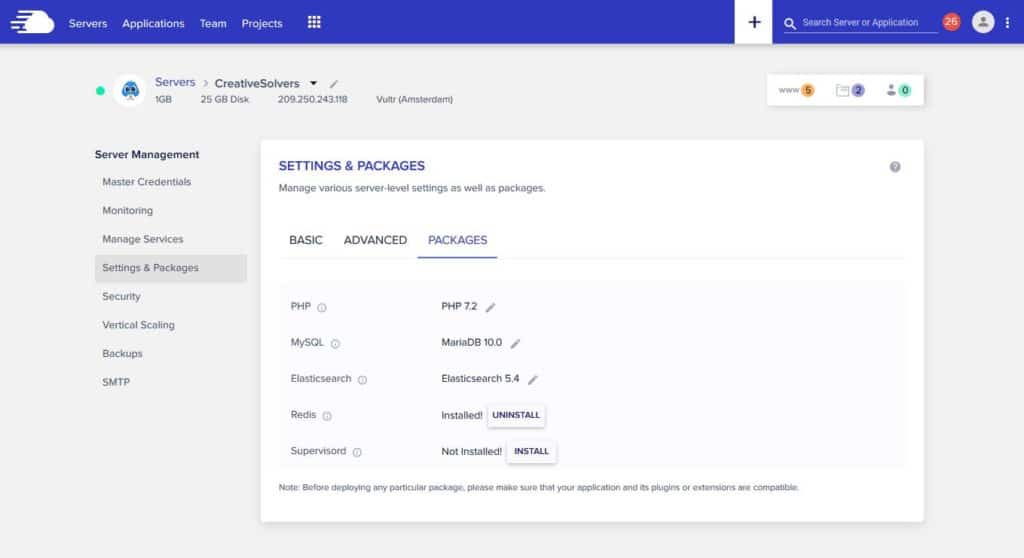
- Log-in to Cloudways and add a new server (or click on an existing server)
- Click on this server, and then on the Settings & Packages tab.
- Choose 5.4 or newer under the heading Elasticsearch.
- Just wait, and Elasticsearch is installed!
If you are using another hosting party, you may want to contact them for the possibilities.
If you’re familiar with server administration, you can also install ElasticPress on your own server. For example on a VPS from Upcloud or Vultr. There is plenty of documentation on the website of Elasticsearch.
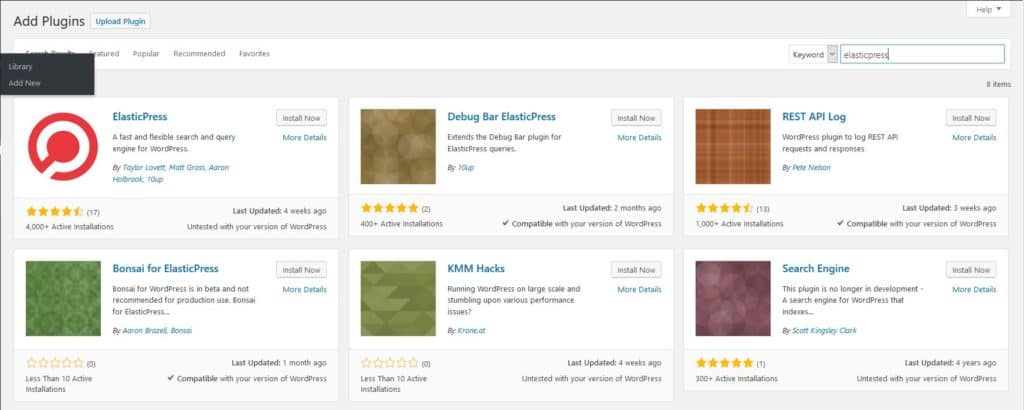
Hurray! Elasticsearch is now set-up at your server. The next step is to install the ElasticPress plugin. This can be done just from the WordPress plugin repository.
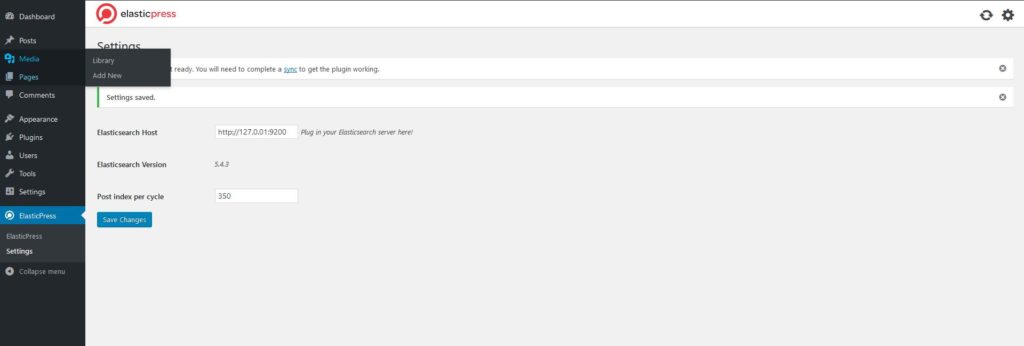
Subsequently, you need to provide the address for the Elasticsearch. Usually, this address is 127.0.0.1:9200. It needs to be set-up at the ElasticPress Settings screen as shown above.
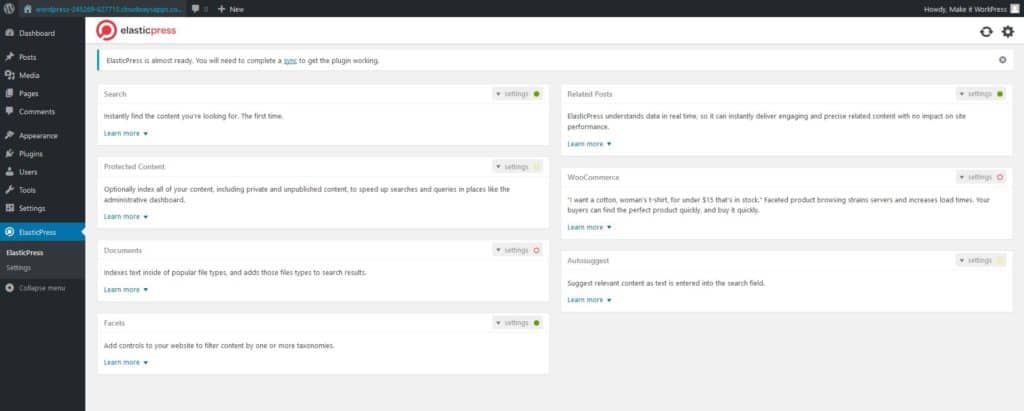
After you have set up the Elasticsearch host, you can alter the settings for Elasticsearch and WordPress.
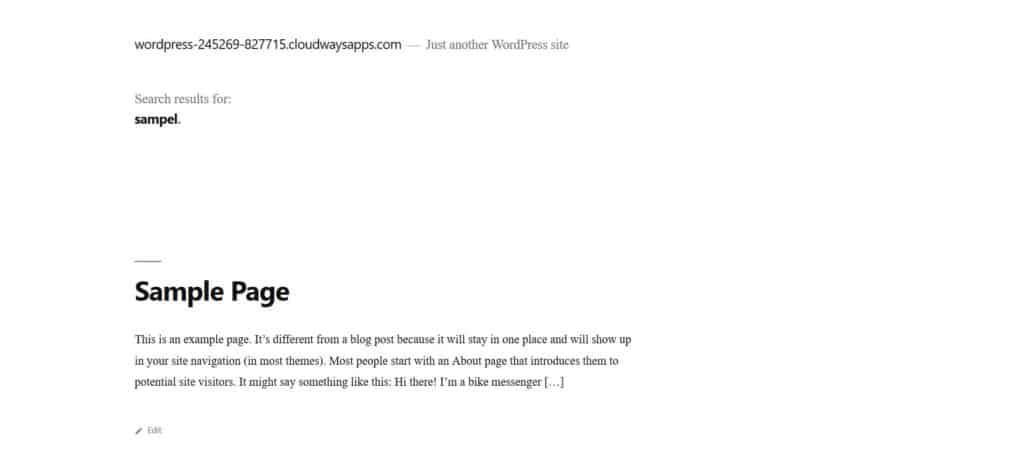
Now, let’s head to the search form on your website. Try searching using some common misspellings of titles of your posts. Do results show op? Congratulations! You have successfully implemented ElasticSearch for WordPress. The powers of Elasticsearch are available for your website. The world of better WordPress search is at your fingertips.
Of course, much is possible with Elasticsearch! This article only covers the basic aspects. Do you have any questions or comments? Do not hesitate to leave them below.